Introduction
Tile Joint Spacing is an important part of tile installation that directly affects the appearance, durability and overall finish of a home. Whether you are installing vitrified tiles in your living room, ceramic tiles in your kitchen or anti-skid tiles on an outdoor terrace, maintaining the correct gap between tiles is essential. Although many homeowners prefer a seamless appearance, installing tiles too closely without sufficient spacing can lead to problems such as cracks, uneven surfaces and grout damage over time.
The right tile joint spacing helps accommodate minor tile size variations, allows for movement caused by temperature changes and provides enough room for grout. For homeowners building a new property or planning a villa in India, understanding this small but important construction detail can make a difference to the long-term quality of the flooring.
Quick Answer
Tile joint spacing is the gap maintained between two adjacent tiles during installation. It is generally measured in millimetres (mm).
- Rectified vitrified tiles: Around 2 mm.
- Standard ceramic tiles: Around 3–5 mm.
- Non-rectified tiles: Around 3–5 mm, depending on their dimensions.
- Outdoor and terrace tiles: Around 3–5 mm or as specified by the manufacturer.
These are practical starting points, not universal specifications. The actual gap depends on tile size, edge finish, manufacturing tolerances, installation conditions and manufacturer recommendations. Movement joints may also be required in larger tiled areas.
What Is Tile Joint Spacing?
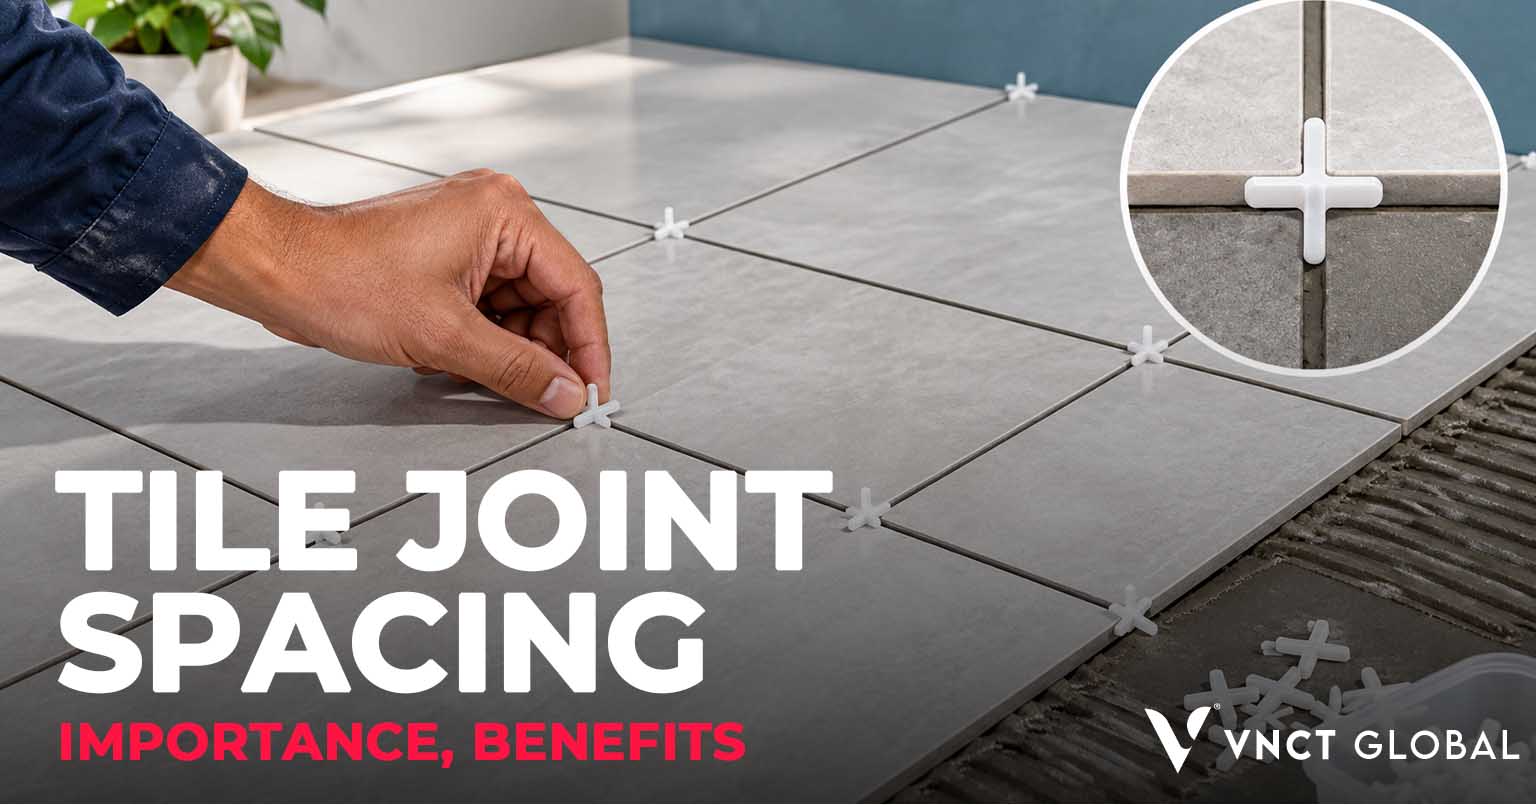
Tile joint spacing refers to the small gap intentionally maintained between neighbouring tiles during installation. This gap is usually filled with grout after the tile adhesive has properly set.
You may have noticed thin lines running between the tiles on a living room floor or bathroom wall. These are grout joints, and they are an essential part of a properly installed tiled surface.
Tile joints are not included only for decorative purposes. They help accommodate slight differences in tile dimensions, provide space for grout and reduce the risk of damage caused by movement.
For example, two tiles measuring 600 mm may have minor manufacturing variations. Without an appropriate gap, these differences can affect alignment and the overall appearance of the floor.
Types of Tile Joints Used in Flooring
Tile joints are not all the same. Different types of joints serve different purposes during installation and help maintain the performance of tiled surfaces.
1. Grout Joints
Grout joints are the visible gaps between adjacent tiles. They are generally filled with cement-based or epoxy grout to create a uniform finish and protect the tile edges.
2. Movement Joints
Movement joints are designed to accommodate expansion and contraction caused by temperature changes, moisture and building movement. They are particularly important in large flooring areas and outdoor installations.
3. Perimeter Joints
Perimeter joints are provided along the edges of tiled floors, such as where flooring meets walls, columns or other fixed surfaces. They help prevent movement-related stress from affecting the tiled surface.
4. Structural Joints
Structural joints are existing joints in the building structure that must be carried through the tile installation. They should not be covered with ordinary grout or rigid tile adhesive.
Understanding these joint types helps homeowners and contractors plan a more reliable tile installation.
Why Is Proper Tile Joint Spacing Important?
Choosing the correct gap between tiles helps prevent several common installation problems.
1. Helps Accommodate Temperature Changes
Tiles and the underlying building materials can expand and contract slightly due to temperature and moisture variations.
This is particularly relevant in Indian homes, where flooring can experience significant temperature changes throughout the year. Proper grout joints and separately designed movement joints help accommodate these changes.
2. Reduces the Risk of Tile Cracks
When tiles are installed too closely, there may not be sufficient space to accommodate dimensional variations and movement.
This can create stress between adjacent tiles, increasing the possibility of chipped edges, cracks or lifting.
3. Creates a Uniform Flooring Appearance
Consistent spacing makes the entire floor look organised and professionally finished.
When installers use appropriate tile spacers, the gaps remain more consistent across the room. This is especially important in large living rooms, hallways and open-plan interiors.
4. Allows Proper Grout Application
Grout fills the space between tiles and protects the exposed edges of the installation.
If the gaps are too narrow, grout may not penetrate properly. This can result in incomplete joints, weak grout lines and difficulties during maintenance.
5. Supports Long-Term Floor Maintenance
Properly filled grout joints help prevent dirt and debris from collecting in poorly finished gaps. They also make it easier to maintain a consistent flooring appearance.
The right grout selection is equally important, particularly in kitchens, bathrooms and other areas exposed to moisture.
Recommended Tile Joint Spacing for Different Tiles
Not every tile requires the same spacing. The correct measurement depends on its type, size, edge finish and installation location.
Here is a general reference for residential construction.
| Tile Type | Indicative Joint Spacing |
| Rectified vitrified tiles | 2 mm |
| Non-rectified vitrified tiles | 2–3 mm or as specified |
| Ceramic floor tiles | 3–5 mm |
| Ceramic wall tiles | 2–3 mm |
| Natural stone tiles | 3–5 mm, depending on the material |
| Outdoor and terrace tiles | 3–5 mm or as specified |
Rectified Vitrified Tiles
Rectified tiles have mechanically finished edges that provide more consistent dimensions. They are commonly used in modern living rooms, bedrooms and premium residential interiors.
A joint of approximately 2 mm is often suitable for rectified vitrified tiles when permitted by the manufacturer’s installation instructions.
Ceramic Tiles
Ceramic tiles may have slightly greater dimensional variations and less precise edges than rectified products.
A wider joint of approximately 3–5 mm may be appropriate, depending on the tile specification.
Outdoor and Terrace Tiles
Outdoor flooring experiences greater exposure to sunlight, rain and temperature fluctuations.
Suitable grout joints and properly planned movement joints are important in these areas. Always follow the tile and installation-system manufacturer’s recommendations.
Natural Stone Tiles
Marble and granite may have natural variations in dimensions, edges and surface appearance.
Their joint spacing should be selected according to the stone, finish, layout and installation method.
Benefits of Maintaining Proper Tile Joint Spacing
Maintaining the right gap between tiles offers several practical advantages.
- Better finish: Consistent grout lines create a neat and attractive floor.
- Improved durability: Properly designed joints help accommodate minor movement and dimensional differences.
- Reduced edge damage: Appropriate spacing reduces direct contact between neighbouring tile edges.
- Better grout performance: Adequate joint width allows the selected grout to fill the space properly.
- Easier maintenance: Well-finished joints help keep flooring clean and presentable.
- Professional installation: Consistent spacing improves the overall quality of the completed floor.
For homeowners investing in a new villa, these small construction decisions contribute to the overall quality of the property.
Tile Joint Spacing for Indoor vs Outdoor Areas
The installation environment plays an important role in determining the appropriate tile joints and movement provisions.
Living Rooms and Bedrooms
Indoor flooring generally experiences more controlled environmental conditions. Joint spacing should be selected according to tile dimensions, edge finish and product recommendations.
Kitchens
Kitchen floors experience regular cleaning, moisture and occasional food spills. Choose suitable grout that can withstand the expected exposure and is easy to maintain.
Bathrooms
Bathrooms require careful attention to waterproofing, drainage slopes, grout compatibility and movement joints. Epoxy grout may be considered where greater stain and moisture resistance is required.
Balconies and Terraces
Outdoor flooring experiences direct sunlight, rain and greater temperature variations. Proper movement-joint planning, suitable exterior-grade adhesive and appropriate grout are essential.
Outdoor Pathways
Outdoor pathways require tiles suitable for external conditions, with proper joint design and drainage. The installation system should account for weather exposure and the characteristics of the supporting surface.
Common Tile Installation Mistakes to Avoid
Even good-quality tiles can produce disappointing results if installation is not carried out properly.
Here are some mistakes homeowners should watch out for.
1. Installing Tiles Without Gaps
Butt-joint installation, where tiles are placed directly against each other, is not a substitute for properly designed grout joints.
Always maintain the spacing specified for the selected tile.
2. Ignoring Tile Spacers
Relying entirely on visual judgement can result in uneven grout lines.
Installers should use suitable spacers to maintain consistent gaps throughout the installation.
3. Using the Wrong Grout
Not every grout is suitable for every tile or location.
Cement-based grout and epoxy grout have different properties. Select a product suitable for the joint width, tile material and exposure conditions.
4. Filling Movement Joints With Ordinary Grout
Grout joints between tiles and movement joints in the building serve different purposes.
Movement joints near walls, columns, structural joints and other specified locations should use an appropriate flexible sealant or movement-joint system rather than ordinary rigid grout.
5. Starting Installation Without Checking the Floor
An uneven base can create differences in tile levels, even when the correct spacers are used.
The installer should check the substrate, floor level and tile condition before beginning the work.
How to Choose the Right Tile Joint Width
Selecting the correct tile joint width depends on more than the appearance of the finished floor. The tile dimensions, edge finish, manufacturing tolerance and installation location all influence the recommended spacing.
Here are some important points to consider:
- Tile size: Large-format tiles require careful layout planning and consistent joint spacing.
- Tile edges: Rectified tiles have more precise edges, while non-rectified tiles may require wider joints.
- Installation location: Bathrooms, kitchens, balconies and outdoor areas have different environmental conditions.
- Manufacturer guidelines: Always check the recommended joint width provided by the tile manufacturer.
- Grout specifications: The selected grout must be suitable for the intended joint width.
A very narrow gap may look attractive initially, but it should never come at the expense of correct installation.
Difference Between Grout Joints and Expansion Joints
Grout joints and expansion joints are often confused, but they perform different functions.
| Feature | Grout Joints | Expansion or Movement Joints |
| Main purpose | Fill gaps between tiles | Accommodate movement |
| Location | Between adjacent tiles | Perimeters and specified movement locations |
| Common material | Cementitious or epoxy grout | Flexible sealant or movement-joint profile |
| Flexibility | Generally rigid | Designed to accommodate movement |
| Application | Most tiled surfaces | Areas requiring movement accommodation |
Grout joints provide a finished appearance and help protect tile edges. Movement joints allow the tiled surface to respond to expansion, contraction and other movement without excessive stress.
It is important not to fill designated movement joints with ordinary rigid grout. Doing so can increase the risk of cracking and tile damage.
How to Measure Tile Joint Spacing
Maintaining consistent tile joint spacing requires accurate measurement during installation.
Here is a simple process followed by professional installers.
- Check the tile dimensions: Measure the tiles before installation to identify variations.
- Select suitable spacers: Choose spacers according to the recommended joint width.
- Position the first tile: Start with a properly aligned reference tile.
- Place the next tile: Insert spacers between adjacent tiles to maintain the required gap.
- Check alignment: Use a straightedge or suitable measuring tool to inspect the joint consistency.
- Inspect before grouting: Make sure the joints are clean and free from excess adhesive.
For example, when installing rectified tiles with a specified 2 mm joint, suitable 2 mm spacers can help maintain consistent spacing. However, the actual specification must come from the tile manufacturer and installation design.
Best Practices for Tile Joint Spacing
A good installation starts with proper planning rather than correcting problems after the tiles have been laid.
Consider the following practices:
- Check tile dimensions: Measure samples from different boxes to identify dimensional variations.
- Choose the correct spacers: Select spacer sizes according to the tile manufacturer’s recommendations.
- Plan the tile layout: Check alignment around doors, corners, walls and floor transitions.
- Use suitable tile adhesive: Choose an adhesive compatible with the tile material and installation surface.
- Maintain consistent joints: Avoid changing spacer sizes midway through the installation.
- Clean the joints: Remove excess adhesive from the gaps before it hardens.
- Allow proper curing: Follow the adhesive manufacturer’s recommended waiting time before grouting.
- Select suitable grout: Match the grout to the tile, joint width and location.
- Provide movement joints: Include appropriate perimeter and field movement joints where required by the installation design.
- Inspect the completed floor: Check grout consistency, alignment, lippage and surface cleanliness.
These steps help achieve a more reliable flooring finish.
How NRIs Can Ensure Quality Tile Installation
For many Non-Resident Indians, building a home in India is an important long-term investment. However, managing construction from another country can be challenging.
You may be living in Dubai, Singapore, the United Kingdom or the United States while your property is being developed in Chennai, Madurai or Coimbatore.
Small construction details, including tile joint spacing, flooring alignment and grout selection, can be difficult to monitor when you cannot visit the site regularly.
Here are some practical ways to stay involved.
Request Regular Construction Updates
Ask the construction team to share photographs and videos of important work stages. Flooring preparation, tile installation and grouting are worth checking before the work is completed.
Understand the Material Specifications
Before installation, request information about the tile brand, dimensions, finish, adhesive and grout specifications.
This helps you understand what materials are being used in your property.
Arrange Virtual Site Visits
Video calls can help you review ongoing construction activities and discuss any questions directly with the project team.
Keep Construction Records
Maintain copies of approved material specifications, invoices, site photographs and construction progress updates.
Having these records makes it easier to track decisions and understand the work completed.
How VNCT Global Supports NRI Homebuyers
Buying a villa in India while living abroad requires more than selecting a location. Buyers also need reliable communication, construction updates, property information and assistance throughout the purchase process.
VNCT Global works with NRI homebuyers interested in residential villa developments in South India. The company provides support to overseas buyers through property information, virtual property visits, documentation assistance and investment-related guidance.
For NRIs exploring villas in Chennai, villas in Madurai and villas in Coimbatore, having access to the right project information can make the decision-making process easier.
VNCT Global’s residential developments include:
- Brookside Residences: A residential villa development in Pammal.
- Palm Shore: An ECR villa development in Chennai.
- Palm Beach: A Chennai residential project.
- Creek Residences: One of VNCT Global’s residential developments.
- Park Villas: A villa development for buyers exploring residential options in Chennai.
- Ocean Drive Villas: A previously launched development where all units have been sold.
Buyers researching the best villa projects in Chennai, best villa projects in Coimbatore and best villa projects in Madurai can explore the available project information and locations before making a decision.
VNCT Global also connects with overseas Indian audiences through events in Dubai and other international locations, helping prospective buyers understand available residential opportunities.
When comparing the best villa developers in India, buyers should consider project documentation, construction quality, location, transparency and after-sales support rather than relying only on promotional claims.
A reliable House construction company in Chennai should also communicate material specifications and construction progress clearly.
For buyers comparing the largest villa developers in India, it is equally important to assess the actual project portfolio, delivery record and quality of construction.
VNCT Global aims to make the property-buying journey more accessible through remote assistance, virtual visits, legal documentation support and investment guidance.
If you are planning to purchase a residential property in India while living overseas, you can explore the available projects and contact us VNCT Global to discuss your requirements.
Conclusion
Tile joint spacing may appear to be a small detail, but it plays an important role in the appearance and durability of tiled flooring. Choosing the right gap, using suitable spacers, selecting appropriate grout and providing movement joints where necessary can help prevent common installation problems.
Whether you are constructing a new home, renovating an existing property or investing in a villa in India from overseas, paying attention to these construction details is worthwhile.
Good construction quality is not just about the materials selected. It also depends on how carefully each material is installed.
FAQs for Tile Joint Spacing
What is the ideal tile joint spacing for floor tiles?
For rectified vitrified floor tiles, approximately 2 mm is commonly used. Standard ceramic tiles may require around 3–5 mm. The manufacturer’s installation instructions should determine the final measurement.
Can tiles be installed without gaps?
No. Installing tiles directly against each other is generally not recommended. Appropriate grout joints are necessary to accommodate dimensional variations and support proper grouting.
What happens if tile joint spacing is too narrow?
Very narrow joints may prevent proper grout application and increase the risk of edge chipping, cracking and installation problems. They may also fail to accommodate the required dimensional variations.
Are tile spacers necessary during installation?
Yes. Tile spacers help maintain consistent gaps between adjacent tiles and improve alignment. They are particularly useful when installing large-format tiles.
What is the difference between tile joints and expansion joints?
Tile joints are the gaps between individual tiles, usually filled with grout. Expansion or movement joints are specially designed gaps that accommodate movement in the building or tiled surface. They generally require flexible sealants or suitable movement-joint profiles.
Which grout is best for bathroom tiles?
Cement-based and epoxy grouts are both used in bathrooms. Epoxy grout offers better resistance to water absorption and staining, while a suitable quality cementitious grout may also be appropriate. The choice depends on the tile, application and product specifications.
Does tile joint spacing affect the appearance of a home?
Yes. Consistent joint spacing creates a uniform and professionally finished appearance. Uneven grout lines can make even expensive tiles look poorly installed.
How can NRIs monitor tile installation in their Indian property?
NRIs can request regular construction photographs, videos, virtual site visits and material specifications. They should also review the flooring layout, grout selection and completed installation before accepting the work.
Is 2 mm tile joint spacing suitable for all vitrified tiles?
No. It may be suitable for certain rectified vitrified tiles, but non-rectified products and tiles with greater dimensional variation may require wider joints. Always check the manufacturer’s instructions.
How can I explore villa projects in Chennai, Madurai and Coimbatore?
You can visit the VNCT Global website to explore its residential developments, understand project details and request assistance with property visits and documentation.